

Starting a new setup can be difficult, especially when there’s no guidance. It can be hard to differentiate between the essentials you need and some additional things that might be nice to have.
Unless you speak to a professional, there’s a very high risk of wasting money on equipment you’ll never get to use. In this article, we’ll outline all the essentials you need to complete your rapper studio setup.
Luckily, a rapper studio doesn’t require a lot of equipment, just the right stuff. You will find that setting up a studio is not a hard task and can be done by just about anyone.
Equipment Needed for a Proper Rapper Studio Setup
Here’s a list of some of the essential equipment you need to get:
1. Recorder
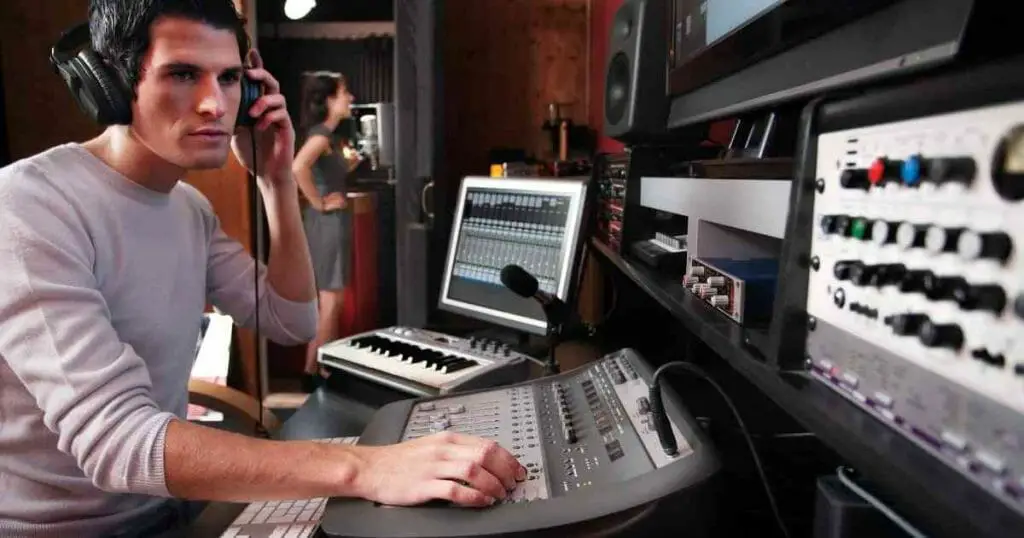
There are two options to choose from for recording. You can select a stand-alone recorder that does not require an audio interface because you can plug inputs directly into it, or you can decide to go for a computer, as most people do.
The computer can be used to both record and edit the sounds produced from the microphone or instruments. There’s no operating system superior to the other in this case. It would be best to get microphones compatible with computers for recording.
Some digital audio workstations are limited to certain operating systems. For example, Logic Pro X is only available for Mac users, and FL studithatch is limited to Mac and Windows. The operating system you choose should complement the DAW you favor.
2. Audio Interface
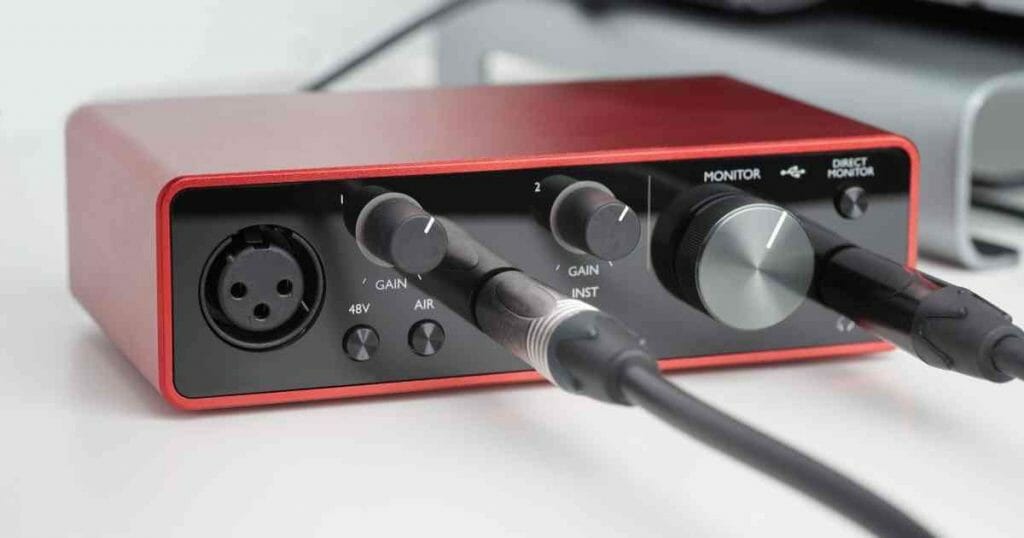
This is also known as the sound card, and it’s very essential in a rapper studio setup. The audio interface serves as a device to plug in external hardware like microphones, guitars, various MIDI devices, etc., and then transfer the data to the computer. Some have a USB cord for plugs, while others use FireWire as a connector.
Also, this equipment processes all the audio that exits the device through digital to analog or analog to digital converters. Audio converters are just like built-in computers or other electronics, but they are advanced enough to be at the professional recording studio level. For this reason, a stand-alone audio interface is necessary for a rap studio setup.
3. Virtual Instruments
This software reproduces the sound of actual instruments with a computer. Virtual instruments are controlled with a MIDI controller that looks like a piano/keyboard, except that it is not meant to produce any sound, unlike the instrument. A software synthesizer is an example of a virtual instrument needed in a rapper studio setup.
A soft synth is a software application or plug-in that runs on a PC. It is a less expensive way to get new synths. The quality of a synth depends on the audio interface attached to the computer.
4. Studio Monitors
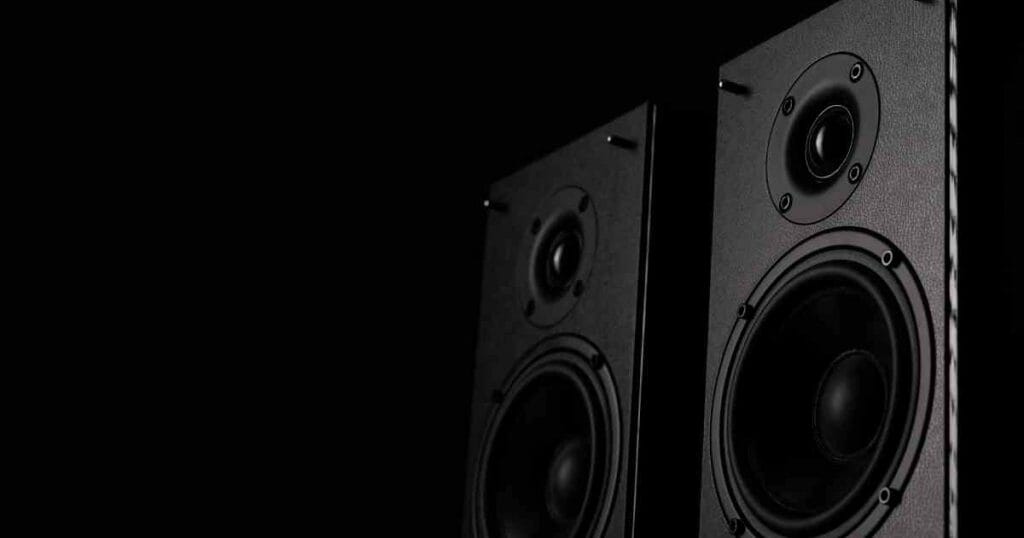
A good studio monitor will not flatten the sounds coming from it. It should have a low-frequency range that allows you to hear various elements of the sound so that you know what needs tweaking.
The setup of a studio monitor entirely depends on the producer. Still, as long as it has the right features, for example, delivering an acoustic sound or ultra-linear frequency feedback, etc., it should be able to do the job irrespective of the price range.
5. Beat Machine
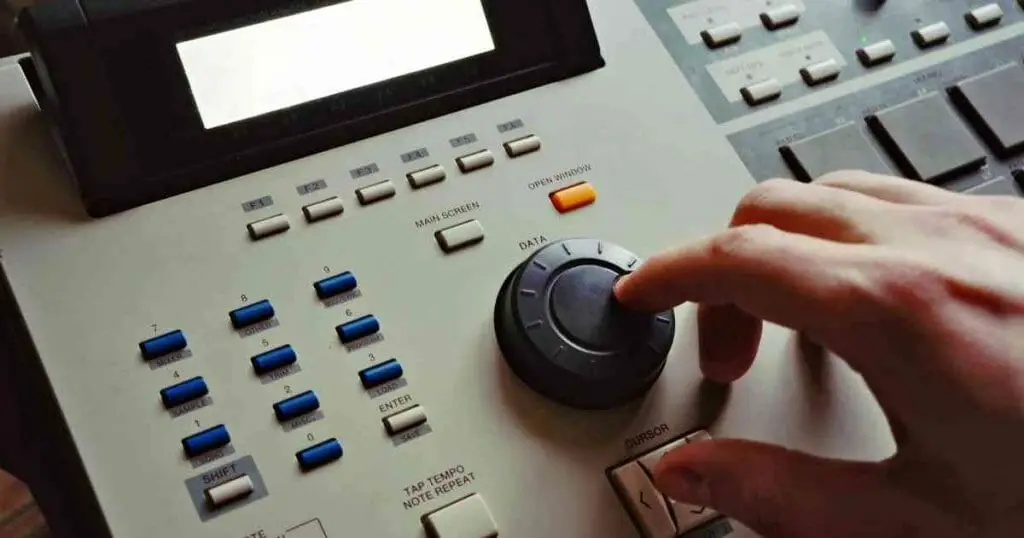
MPC (music production centers) is a stand-alone beat machine used by many producers/rappers to make hip-hop beats. This combination drum machine and sample permits users to upload different sounds, modify, and control them. You need to plug the machine’s audio interface directly into the computer to record the beats made on the MPC and then into your DAW as an audio file.
6. Headphones
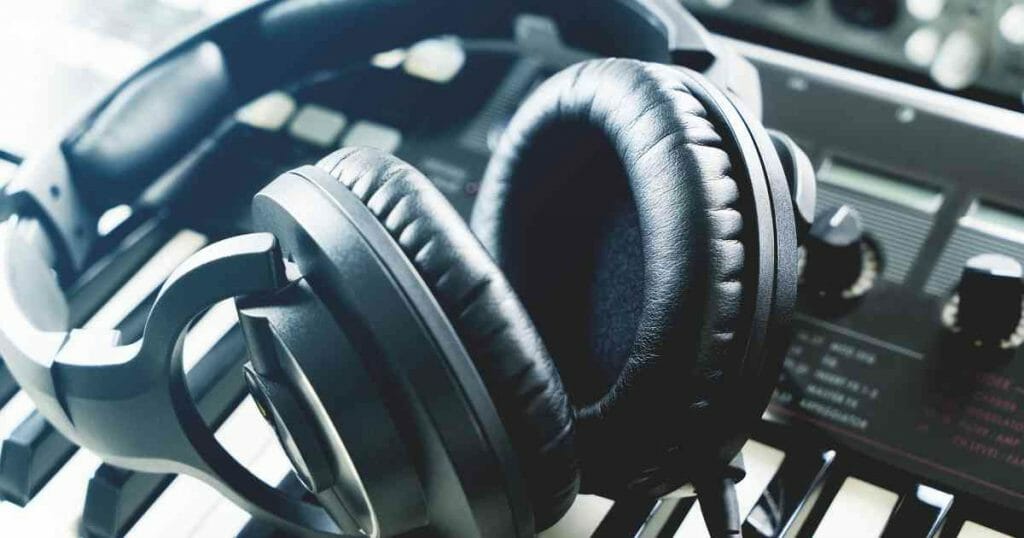
The performer wears headphones to listen to the instrumental of the song rather than playing it out loud, which will lead to bleeding. Headphones are also useful for monitoring the performer’s vocals or mixing to create the final product.
There are so many types of headphones to choose from, so it’s entirely up to you to decide what works best. It is important to note that studio headphones and regular ones perform completely different functions. One is meant to listen to sounds raw (pleasant or not) to fix flaws, while the other is for listening to pleasing sounds that have already been altered. With that being said, a good pair of headphones should have a flat frequency response so that no element overpowers the others.
Headphones can either be open or closed-back. Open-back headphones are used to listen to frequencies and sounds properly. They are recommended when sound leakage is not an issue. On the other hand, closed-back headphones are great for mixing and recording as they block any sound from coming in and escaping.
You can pair your headphones with amps if your headphones have a high impedance or low sensitivity, which is not very efficient. This may not be necessary, as some headphones have built-in, noise-canceling amps.
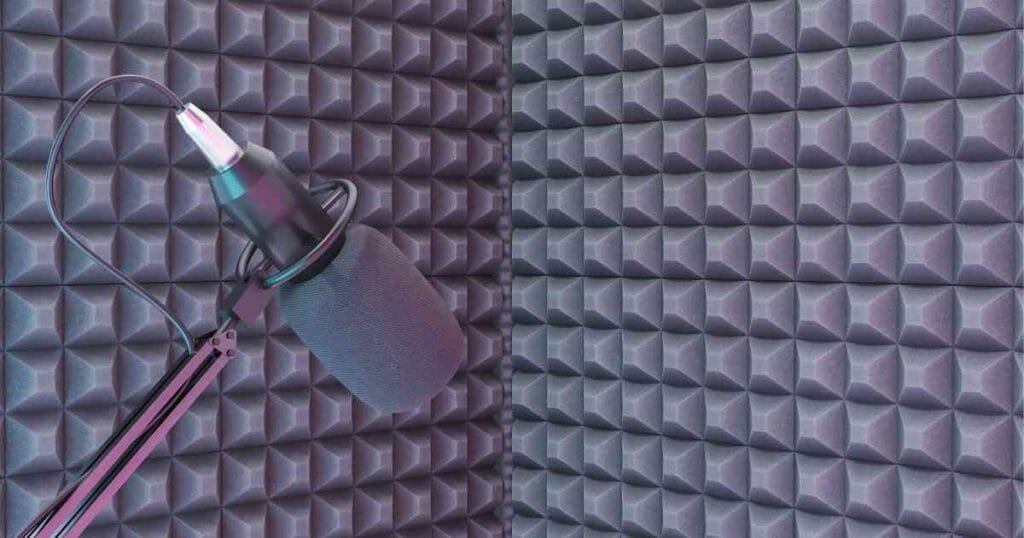
7. Microphone

This is one very important piece of equipment in a recording studio. Without it, it’ll be difficult to make instrumentals or vocal recordings. There are three types of microphones commonly used in music production: large-diaphragm condenser mics, dynamic mics, and USB mics.
Large-diaphragm condenser mics are used to record vocals or acoustic instruments in professional studios because of their ability to pick up low-end sounds. They have a better frequency response.
On the other hand, dynamic mics do not have a good frequency response. They are better for recording strong sounds like drums in a live setting.
USB microphones have a built-in interface that allows you to plug them into a USB port. They’re great for recording vocals in a studio. However, they cannot record instruments that need multiple microphones.
The type of microphone you choose should be based on what you want to record. You can begin with these affordable microphones for rapping until you figure out what works best for you.
Other additions to a microphone are:
- Shock mount: A mechanical fastener that uses elastic to connect a microphone to a threaded mic stand. It is used while recording to reduce the vibrations and noise the mic makes.
- Pop filter: This stops the power from the pronunciation of plosive sounds from reaching the mic. Some mics have a built-in pop filter.
- Microphone preamps: These are beneficial for any microphone to boost a signal to a higher line level.
8. Digital Audio Workstation
DAW is an electronic device or application software that allows you to record, mix, edit and produce audio files. It can be an integrated standalone unit or a single software program on a laptop. There are many DAWs available to choose from, such as Ableton Live, Logic Pro, FL Studio, Cubase, etc.
9. Control Surface
A control surface gives you control over the soft synths of your DAW software. You can make commands via various knobs, faders, or buttons. Control surfaces connect to the DAW through FireWire, USB, or Ethernet. MIDI is often used for communication. There are exceptions to the type of software and hardware they are compatible with, but overall, they give you more visual feedback and allow room for more creativity. It’s definitely an upgrade from using your computer mouse and keyboard.
10. MIDI Keyboard
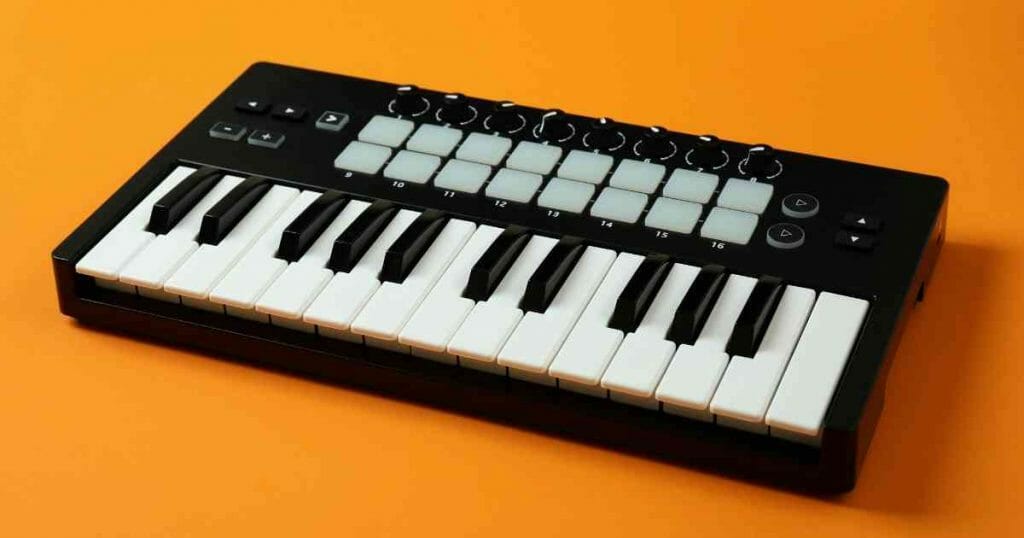
A Musical Instrument Digital Interface is a controller keyboard that transmits and receives MIDI information. It can be connected to your DAW and computer with a USB cord. This setup does not need an audio interface. It can be used to play electronic instruments programmed to the DAW or to program drum beats and change the tone. You cannot play a MIDI keyboard on its own, and that’s the difference between it and a regular keyboard.
11. Plug-ins
Plug-ins are a software addition that allow your DAW to enhance recorded audio files. Effects like reverb, virtual instruments, and autotune can be added through plug-ins. The types of audio plug-ins include:
- Distortion plug-in
- Reverb plug-in
- Delay plug-in
- Compressor plug-in
- Delay plug-in
- Equalizer plug-in, etc
Essentials Needed for the Acoustic Treatment of Your Studio
Acoustic treatment is the process of elevating the acoustic properties, particularly for recording and mixing. This process involves putting up diffusion and absorption devices in areas where reflections may occur. This will make the room produce a neutral-sounding recording and promote quality control.
These treatments take form in various ways, and, if done right, they can make a big difference in creating definition without having reflection bounce off hard surfaces.
You should not confuse acoustic treatment with soundproofing, which is the process of making a room resistant to sound waves. The sole purpose of acoustic treatment is to prevent internal sounds from leaving the room and external noise from coming in.
A rapper studio needs acoustic treatment because if the room is not set up to produce acoustic sound, the audio will reflect around the room. It doesn’t matter if you have quality equipment to record music — this reflection will impact comprehension and the enjoyable experience of listening to a recording.
The studio setup is incomplete until this solution is implemented in a room. The various types of treatments include:
1. Diffuser Panels
These are meant to diffuse sounds in cases where you don’t want them totally absorbed. These panels are three-dimensional with various pieces that stick out. Once the sound hits the diffuser, it will scatter to random areas.
The difference between acoustic and diffuser panels is that the former absorb sound while the latter scatter sounds over a wide angle.
2. Acoustic Panels
These are thinner versions of bass traps that are not intended to catch lower frequencies. They solve the problem of reverberation (persistent sound or echo after a sound is produced).
They absorb sound waves instead of allowing them to reflect and roam around the room, which reduces echo. The best thing about this panel is that it is inconspicuous. It can be right there in plain sight along the walls, and people will think it’s part of the room’s decor.
3. Bass Traps
These are made from strong fiberglass and foam that soaks up low-frequency sound waves in the corner of a room. These soundwaves are long, strong, and hard to control, making the bass in a room sound too loud. It is essential to prevent sounds from becoming muffled in a small room area.
There are different types of bass traps that can be installed to solve this problem, as well as mid and high-frequency issues. They are mostly installed in the corner of a room.
4. Helmholtz Resonators
Unlike the rest of the items on this list, this treatment is not so popular in recording studios. It provides a solution for something a little different: resonance. Resonance is imperfections caused by instruments or the recording area. It can also happen digitally when soundwaves of the same frequency mix up.
The Helmholtz resonator is a hollow-shaped object with a small opening at the top that absorbs standing waves. The resonator is tuned to the frequency causing the problem, thereby getting rid of it. It also has various types and sizes you can choose to install.
5. Ceiling Clouds
This acoustic treatment is meant to be hung horizontally from a ceiling. It reduces reflected sound in a large open area. It is made from different specialized materials to reduce excess sound reverberation.
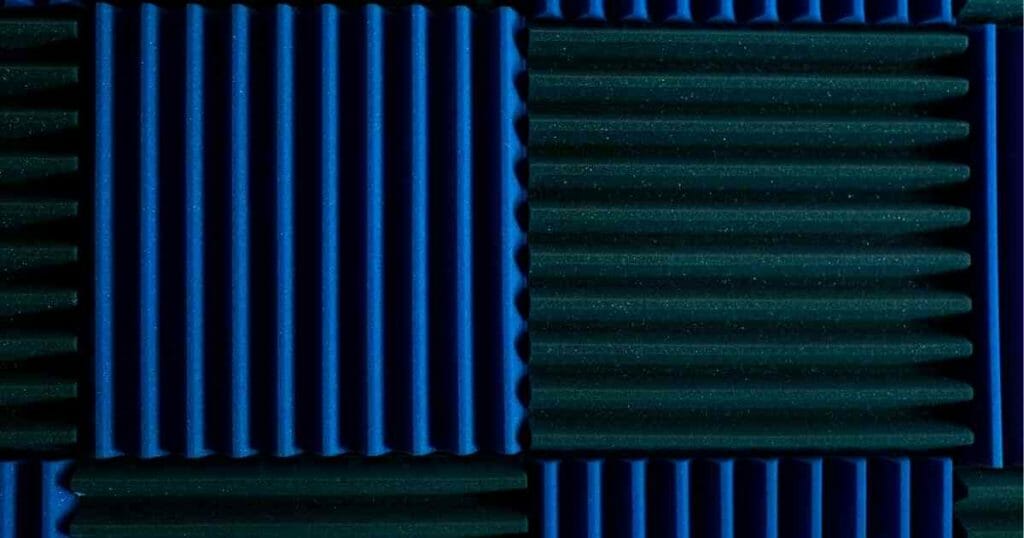
6. Acoustic Foam
The acoustic foam treatment is similar to that of an acoustic panel. It reduces reverb and echoing and allows for better control of sounds during recordings. It can also reduce noise pollution, although it does not provide soundproofing solutions. With this installed, sounds can’t travel and bounce far.
7. Fiberglass Insulation
This helps in a room where sound bleeding is a problem. It is designed so that it absorbs longer wavelengths depending on how thick or thin the panel installed is. Also, it stops reverberation problems and can be installed just in the corner of a room.
Conclusion
A proper rapper studio setup requires specific attention to detail. This is not limited to just the equipment but the recording area also. To get a music industry standard recording, you must put time, patience, and knowledge into building your setup.