
If you are a singer, a musician, or a podcaster, you aspire for the highest quality audio recordings. Even with the best microphone and accessories, you may observe an obvious background noise in the audio.
When you record in your room, the sound bounces off walls and ceilings, creating an echo. The sound reflection results in a residual sound that is recorded, severely affecting the sound quality.
But, you don’t need to worry. You can learn how to put acoustic foam on wall areas to cut down the sound reflection through this blog.
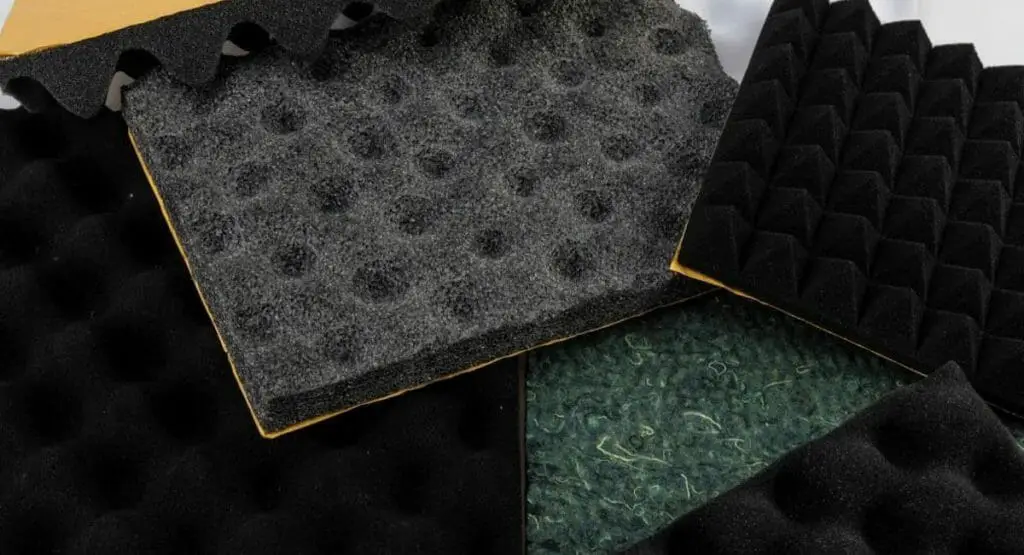
Acoustic treatment is a necessity for places like recording studios, music rooms, and home theaters. Acoustic panels are one of the most affordable and commonly used methods for acoustic treatment.
These foams absorb sound and prevent them from bouncing off walls and getting recorded. This minimizes the interfering sound waves in the recording room and helps you get the best sound quality. Let’s learn the different ways to mount acoustic panels on walls.
How to Stick Foam Sheets on Walls
You can stick foam sheets on your walls using adhesives and nails. While these are effective methods, they can also damage your walls. If you use adhesives, it will peel off some of the wall and the foam when you remove them, and you won’t be able to reuse the foam.
Using nails is probably the most convenient and cheapest method, but it leaves your wall with holes when removing the foam. If you live in a rented place, you should choose acoustic treatments that won’t damage the walls.

Fortunately, you can use Command Strips to mount acoustic foam panels. The details are as follows:
How to Put Acoustic Foam on Walls Using Command Strips
Command Strips help you mount your acoustic foam on your walls easily. The biggest advantage of using these strips is that they don’t stick to your walls when you remove them, and they come out easily without leaving their bits behind or damaging walls.
Acoustic tiles don’t have much weight, so they can be pasted easily with these strips. For mounting foam on your walls vertically, paste the Command Strips on the corners of the foam tile. Now, place the tile on the marked wall and press on all corners.
If you want to go economical, you can use two strips per tile for upper corners. It can work well if you have to hang them horizontally, and you will need to paste them on all four corners if you have to stick them to the ceiling.
Using these strips doesn’t only save your wall but also keeps your acoustic foam panels safe. You can safely remove them and reuse them if you relocate or want to change the placement.
Using Command Strips can become an issue if you have to cover a large area, and using the strips can get pricey if you have to use a lot of panels. In such cases, you can check out this video to learn how to put acoustic foam on wall areas using nails.
Using A-1-Sized Mail Boards to Mount Acoustic Tiles
You can use A-1-sized or larger mail boards to mount the acoustic tiles to your wall. You can get these from an art store around your area. Mail boards are cardboards that are used to mount artwork on walls.
You can paste your acoustical foam together on these mail boards through tacky glue or spray adhesive. You can hang these boards on the wall with nails or bigger Command Strips.
Multiple tiles along with the mail board can get heavy. If you want to use Command Strips, then use picture hanging strips rather than poster strips. These are like velcro, so you can also reposition them if they are slightly off-center.
Using Spray Adhesive for Acoustic Foam
Mounting foam panels on walls with spray adhesive works only with smooth walls. If your wall surface is textured, the panels may not hold firm. You can also use cardboard or engineered wood to keep your walls safe. Follow the steps provided below:
- Figure out the area where you need to install the foam panel and mark it with masking tape or pencil.
- Clean the surface thoroughly with rubbing alcohol and wipe it off.
- Spray the adhesive on the back of the acoustic foam and on the wall surface where they are to be installed.
- Place the foam on the wall surface and keep it pressed for 30 seconds.
- Try to maintain the room temperature at around 70 degrees Fahrenheit for two days.
You can paste the acoustic panel on engineered wood and then mount the whole setup on the wall using nails. This will reduce the extent of damage to the walls. If you have to remove the foam later, it won’t be much hassle.
How to Place Soundproof Foam on Walls for Maximum Effectiveness
You should first identify the places which reflect your voice to the microphone. You can sit at your recording table and observe the areas from where the reflected sound can come back to your microphone.
If there is a wall right in front of your recording table, the sound can reflect back from the wall. You must cover some region in front of your microphone to reduce these reflections. You can refer to this blog to learn how to build a studio desk.
Corners are very tricky as far as sound reflection is considered. They can redirect the incoming sound in multiple directions, creating interference and damaging the sound quality. Make sure to cover the corners near the microphone with thick foam panels.
You can check out this video to analyze how to place acoustic tiles strategically.
Considerations Before Installing Acoustic Panels
There are some factors that you should consider before installing acoustic panels on your wall, including the following tips.
- You should place the acoustic sheets strategically to absorb the residual sound perfectly. If installed incorrectly, it may not absorb the sound, which defeats the purpose entirely.
- They can be a fire hazard. Look out for instructions or fire safety standards before you purchase one. They can catch fire very easily and also produce black smoke while burning.
- You don’t need to cover the entire wall of your room with foam panels. It is redundant and can even make recordings sound unnatural.
- Thin foam panels can only absorb higher frequencies efficiently. You would normally need thicker panels for effective absorption and superior sound quality production. Foam material is also important, as a thinner material can absorb sound better if the material is high quality.
If you have already bought a thinner foam panel, install them a few inches away from your walls. This creates a buffer between the foam and the wall and improves sound absorption. Refer to this article to learn the approximate cost of soundproofing a room.
Alternatives to Acoustic Panels
There are other alternatives to placing acoustic foam on walls. These include the following:
- You can create an acoustic cloud on your ceiling above the listening position. It will absorb the sound and add aesthetic value to your room.
- Placing your furniture strategically in your room can also go a long way in minimizing residual sounds. Soft and porous cushions or couches absorb sound pretty well.
You can look at some other alternatives here in this blog.
Conclusion
In this article, we discussed how to put acoustic foam on wall areas. Using Command Strips or mail boards is convenient and keeps the walls of your room safe. You can also use nails to place these acoustic tiles if you don’t mind holes.
If you are looking for other resources to improve your audio recording, you can read the articles here.