
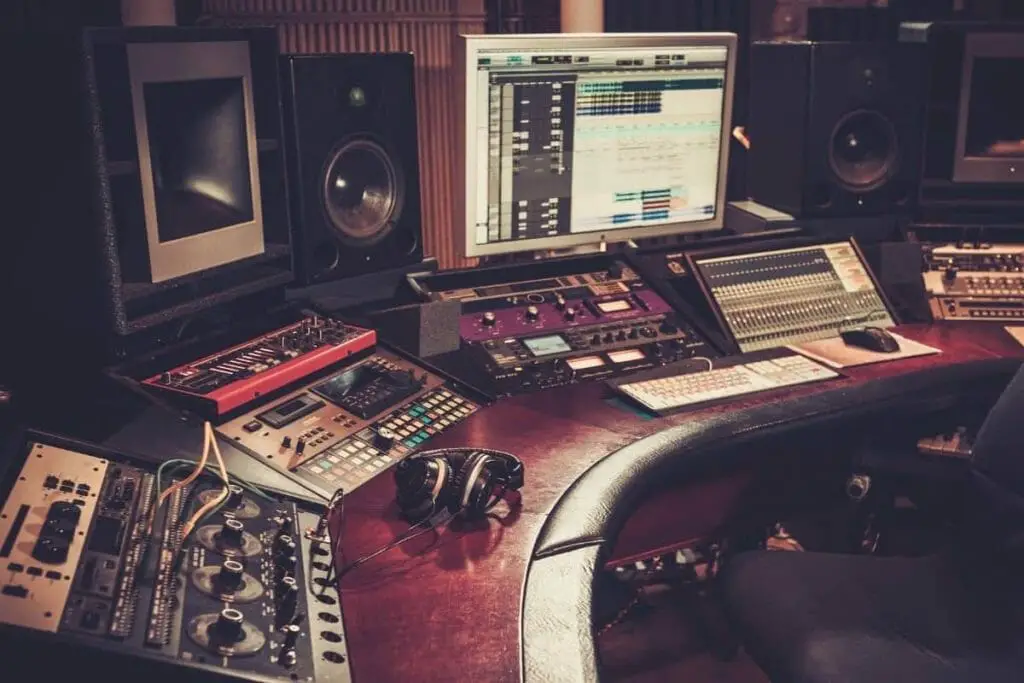
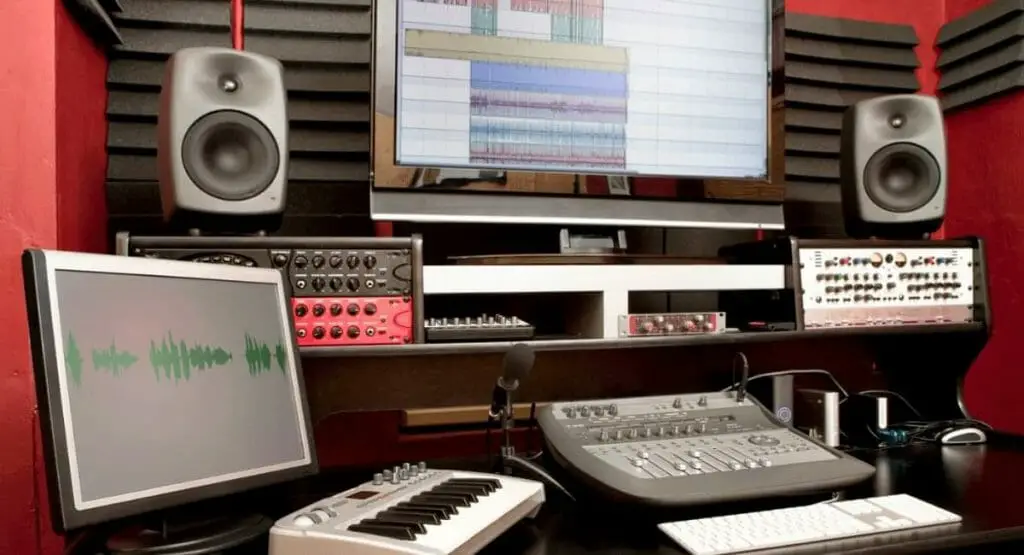
For any music producer, having a studio desk is essential, but desks can be expensive and each producer has different needs and preferences. This is often why producers consider building a studio desk for great music production.
A good recording studio desk can be implausibly beneficial. Finding and implementing a DIY studio desk layout is similar to attempting to construct a complex building-block castle after misplacing the directions and having to assemble the components yourself.
As you search the internet, you’ll see that there are a lot of people who have made their studio desks but very few have thoroughly recorded the process. Rather than heaping plans on you with no explanation, you’ll see what to consider before making a perfect studio desk and how to build a studio desk from scratch.
How to Build a Studio Desk: What to Consider
Before you start throwing your DIY studio desk together, it’s a good idea to give some thought to how you’ll go about it. After all, you don’t want to begin construction only to realize you’re not getting what you want out of your project.
Here are a few things that we recommend you consider before starting:
Size of Your Studio Desk and Building Plan
Height
The first thing you’ll want to consider is the largest surface on which everything else is dependent. The industry average for the height of a desk is 29 inches, and that’s something to consider.
This doesn’t imply that yours has to be 29 inches tall, but that particular height is a one-size-fits-all option for huge manufacturers that want to save some money by avoiding customization.
That said, you should decide if you want to stick to the 29 inches or go for something else. Consider your height or if there would be a need for space underneath the desk for a slide-out keyboard or other equipment. Overall, 29 inches is the perfect height to begin your build.
Width/Depth
The width and depth of your studio desk are also important to consider. We recommend that you make your studio desk at least 40 inches wide, though 60 inches is ideal if you’re looking for a studio desk that offers a lot of room for work and equipment.
The depth of the desk should be anywhere between 30 to 40 inches or more. This depends on what you intend to add to your studio desk, such as various shelving units with space beneath them.
Think about how many screens you’ll be using and the amount of room they’ll take up when deciding on the width of your desk. If you might have more than two screens, particularly ones that are 24 inches or wider, the monitors for your speakers won’t be able to be set in the optimum mix position.
Shelving for Your Computer, Monitors, and Racks
If shelving is something you’d like to have on top of your desk, there are a few options. The aim is to raise the height of your computer screens, including the mix monitors, so that you’ll be able to see and hear at the same level while you’re seated.
The gap beneath the shelving should be utilized to store a number of things like a MIDI controller or papers, or it can be fitted with rails so that the most often used rack-mounted equipment can be installed closer to you. This is useful for audio interfaces, equalizers, and anything you can think of that has to be tweaked regularly.
Compartment for the Keyboard
If you’re going to include a slide-out drawer (keyboard tray) that will house a keyboard for typing or perhaps a musical keyboard, you’ll want to include its dimensions while deciding on the height of the desktop, itself.
If you carefully measure the perfect height you want for your desk before attaching a 6-inch sliding partition to the bottom, your legs will not be able to rest properly beneath it. You’ll need to find a middle ground someplace, most likely by raising the desktop’s overall height.
Cable Management
You won’t have serious issues with managing the cables if most of the preceding ideas above are followed. However, if you need to run some wires through the desk, you should use hole saws. These are drill bit connections for a handsaw folded in circle used to drill out holes. Paddle bits can also be used, although obtaining one that’s large enough can be difficult and unstable.
Mounting power strips at the base of your desk or behind a leg is another option for pre-planning your power management. The idea is to hide it somewhere where it won’t be obvious and so that there aren’t a lot of cords lying around.
However, if you choose to put rack gap on the top or beside the base, where there may be cupboards and drawers, you have the choice of connecting power conditioners to deal with any electrical problems or cable management disasters that may occur.
Cabinet for Rack Equipment
If the desk is large enough, you may even be able to make use of the extra space by adding extra rack rails to where cupboards and drawers might have been. This will not only work as vertical holds for your desk, similar to table legs, but it will also position all of your mounted equipment closer together.
Having constant contact to signal processors will provide you with a lot of time when recording and mixing because you won’t need to vacate your position in the mixing seat. Place your most often used items in cubby holes on the top of the desk. These are elements that you will have to use the most, such as a band’s control station mix, equalizers, and recording interface.
Then, in place of cabinets and legs, the most often used tools should be positioned in the uppermost rack space. The items that aren’t always used should be placed near the power control conditioners at the base.
Studio Desk Building Materials
Particleboard
Knowing how to build a studio desk begins by deciding on the material for your new desktop, legs, cabinets, and other parts of the desk. By using a material like a compressed particleboard, you can reduce the entire structure’s weight.
It’s identical to a piece of plywood, but what differentiates them is that the particle board is essentially compressed dust with bonded outer layers. This type of material was most likely on your classroom desks and lunchroom tables. On the downside, moisture and fluids can cause swelling and lead to rough surfaces.
Hardwood
Expect a weightier, but more durable, studio desk if you decide to use solid hardwood. You don’t have to use wood that’s pressure-treated, but you should go with something stronger than pine. Pine will wind up with plenty of creases and scrapes over time.
You’ll probably need to stain the wood to get the specific color you like, and then coat your desk with polyurethane to keep it protected from liquids, scrapes, and humidity. You can use the same materials for the legs and cabinets. This makes for a long-lasting DIY studio desk.
How to Build a Studio Desk With Design Suited to You

The lack of studio desk design plans is due to the fact that many people decide to construct desks that are specific to their needs and design preferences. Most DIY studio desks aren’t a one-size-fits-all design, which could be why you don’t come across many of these “how-to” projects on the internet.
That said, you could construct the main surface first, then add customized cubbies for rack rails and rack-mount equipment later on. If you have not yet soffit mounted them yet, you might add speaker monitor supports to the sidewalls. Some people would like a tilting tabletop with a built-in digital console mixer.
Aside from being able to personalize the desk to your particular needs, another advantage to building your studio desk is that it can be incredibly inexpensive. This calculation only works if you already have access to woodworking tools and don’t include the cost of free time spent building the structure.
If you can manipulate yourself into that circumstance, you may have a lot of fun with this project and finish with a beautiful desk that you love.
Studio Desk Design Options
Cheap Studio Desk
When it comes down to it, this cheap DIY studio desk design is ideal for a novice, someone on a tighter budget, or someone with limited room to work.
Studio Desk Build Instructions
With the design constructed, all that’s left is to find the wood for the desk surface. In this case, a western cedar can be used.
Step 1: Prepare the Desk Surface
First of all, sand the wood that you plan to use as your desk surface. You can use a belt sander or an orbital sander or both tools to achieve optimal smoothness. The goal is to reveal the true color beneath the weathered surface and see if it’s something that could be used for your studio desk. If you’ll be joining your woods together, glue the boards together in different sections.
Use five bar clamps to hold the boards together while glueing them together. Clamp the boards down with a few pieces of 2x4s to straighten them out and keep them as level as possible. Then leave them to dry completely for 24 hours.
Even with this method of attaching the boards, the surface will still be rough and would need to be planed down. Even if you don’t have a planer, you can make use of several hand planes. Plane down the gaps and unevenness generated by connecting the boards using a hand plane.
For the finishing, sand the tabletop with the orbital sander until it’s perfectly smooth, first with 80 grit sandpaper, then 120 grit, and finally 180 grit. Then, manually sand the surface with 220 grit. After this process, use a basic bristle paintbrush to apply any paint of your choice. You can coat your desk surface three times or more, depending on the vibrance of stain or paint you want.
Step 2: Work On the Frames
When it comes to studio desk frames, pipes and fittings with an aged look are becoming increasingly more popular. To create an aged look on your studio desk frame, you can use a Perma Blue Liquid Gun and steel wool pads. Begin by painting the fittings and tubing with the Perma Blue Liquid Gun.
This can be accomplished in a couple of different ways, including dipping the fittings in the liquid, pouring it directly on them, or applying it with a towel. Use the Steel Wool pads to scrape and scratch it off after applying the Liquid Gun. To get a very aged look, repeat the process a few times.
Step 3: Assemble Surface and Frame
Now that you have your frame and studio desk top constructed, it’s time to build the desk, with the desk surface in place and the pipe colored to your liking. Start by putting the frame together in pieces. This procedure is simple and will take only a few minutes for you to complete. From there, you’ll be able to finish putting the frame together.
Place the desk surface on the fully built frame before attaching it to the frame. The desk surface should be lined up and the edge uniformly spaced. Then, bore a pilot hole in the wood and fasten the top with flathead wood screws.
Step 4: Add Shelving
For the shelves, mount the flange fittings to the shelf that would run across the tabletop of the desk. Mount the shelf supports to the outer part of the desk while connecting the shelf. The internal shelf supports will be left independent, allowing the audio interface and rackmount computer to swing freely once installed.
Step 5: Add Storage
For storage, you can get drawers that come in different designs and sizes. You can also purchase cable management and keyboard trays that can be screwed under the desk surface.
And that’s how to build a studio desk!
Frequently Asked Questions
Q: How Deep Should a Studio Desk Be?
A: When you add a shelf, most desks are 23 5/8″ deep, which may be too shallow for your needs. If you have the space, choose to build a desk with a depth of 25 5/8″ or 29 1/2″.
After that, choose your shelf. There are several options, but you might want to go with the one that comes with two cord-hiding drawers. Finally, get a leg fastener to secure the shelf to the desk. Voilà! You now have a two-layered studio desk in your home.
Q: How Much Does it Cost to Build a Studio Desk?
A: If you’re really into the build and want a desk with all the quirks, building a studio desk from start to finish can potentially cost more than $2,000.
That said, not everybody has that kind of money to throw at a customized studio desk, so if you’re looking for an affordable DIY solution, it will most likely cost you between $100 and $400 to build your own. The cost effectiveness of building your own desk is the primary reason why constructing a DIY studio desk is becoming more popular than buying one new.
The best part about this DIY project is that you don’t need to be proficient in woodworking to make a decent desk for your studio. The most crucial aspect of this entire project is to take your time and not rush through any of the steps. After all, you don’t want to end up with a shaky, low-quality desk to wreck all of your future studio sessions.
Q: What Features Should I Include in My DIY Studio Desk?
A: The studio desk features that you’ll incorporate in your project will largely fall down to your preferences and needs. That said, any studio desk worth its salt will have a shelf that elevates both your studio and computer monitors. It’s crucial to elevate your studio monitors since the greatest sound comes from speakers that are always at ear level.
Studio desks can also be used to store your equipment. If you have a lot of equipment you use to record, it’s a good idea to build a studio desk that can house all of your tech. You’ll be able to keep your hardware out of the way with a suitable studio workstation, allowing you to keep your workspace clutter-free.
Q: How Long Will it Take Me to Build a Recording Studio Desk?
A: How long it will take to build your DIY studio desk is entirely up to what features and materials you’ll be using for your project. If you’re looking to make a cheap, temporary, or small studio desk, you’ll probably be able to knock it out in a week or even in a single day if you set aside the time.
On the other hand, if you’re looking to put a ton of work into a personalized studio desk, you can expect to be working on your project for at least a couple of weeks, if not longer. Decide on the materials and dimensions of the studio desk before you begin your build so you can plan your project out accordingly.
Conclusion
When it comes to DIY studio desk, there’s rarely a one-size-fits-all solution. The design of a studio desk generally falls down to the musician’s needs, tastes, and how much space they need for equipment.
Studio sizes also vary, and the amount of equipment from musician to musician will range also, which means that studio desk size will vary, as well. By the end of this guide you should hopefully know the basics of how to build a studio desk.
You have a step-by-step guide for how to build a temporary desk until you can find a more permanent studio solution! At the very least, you know what materials you can expect to buy for this project and roughly how long it will take you to complete.
Best of luck on your DIY studio desk project, and take care when operating cutting tools, sanding tools, or other machinery when building your desk!